How to configure clover for your hardware. Installing and configuring the Clover bootloader on your hard drive. Making a bootable Clover USB flash drive with MACOSX from Windows Installing and configuring clover
Despite the fact that macOS High Sierra is in beta testing, everyone can try installing it on a Windows PC. The task is not entirely trivial, but quite feasible.
Required software
Unibeast does not currently support macOS High Sierra Beta, so we will use workarounds.
So, you will need:
- Installation file.
- A copy of the Clover installation package, available at.
- A flash drive with at least 16 GB.
Preparing a USB stick
First of all, you need to prepare a USB flash drive. If there is data on it, move it to another location.
Connect the flash drive to your Mac, open Disk Utility and format the drive. Create a single GUID Partition Table and make sure it is formatted as Mac OS Extended (Journaled).
Creating a bootable USB drive
To create a bootable USB stick, you only need the macOS High Sierra Beta installer downloaded from the Mac App Store. Connect your USB flash drive to your Mac, open Terminal and enter the following command:
sudo / Applications / Install \ macOS \ High \ Sierra \ Beta.app/Contents/Resources/createinstallmedia –volume / Volumes / USB –applicationpath / Applications / Install \ macOS \ High \ Sierra Beta.app –nointeraction
Enter the password for your account and press Enter.
Installing Clover
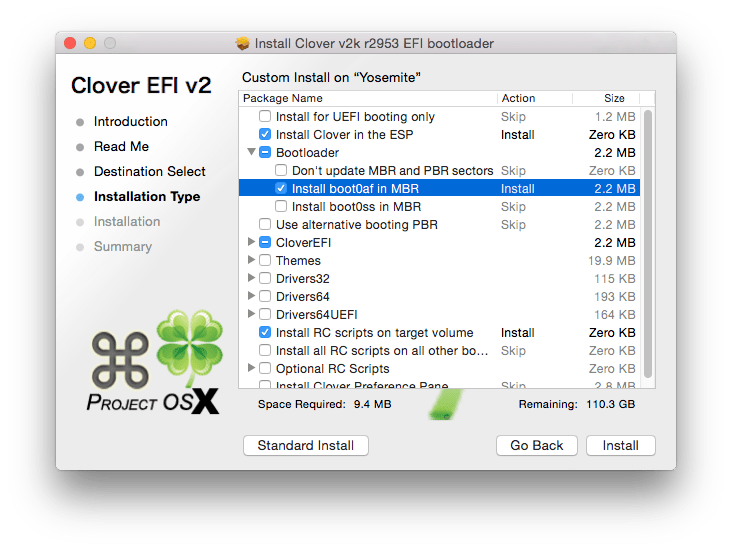
After you see “Done” in the Terminal, you can proceed to the next step. Run the Clover installer and follow the instructions on the screen. When the program asks for the installation location, specify the path to the USB flash drive and click "Customize".
Make sure that only the following items are checked:
- Install for UEFI booting.
- Install Clover in the ESP.
- Themes (optional)
- In the Drivers64UEFI section check EmuVariableUefi-64 and OsxAptioFix2Drv-64
You can select "Themes" if you need embellishments.
After that click "Install" and enter your password again.
Configuring the Clover bootloader
By default, Clover can activate features that you don't really need. Therefore, you need to edit config.plist, for which open Clover Configurator and select the "Mount EFI partition" option. Bootloader configurations depend on your hardware.
Usually you don't have to choose anything here.
The most popular features to be activated are:
- Verbose (-v).
- nv_disable = 1 if your graphics card is from Nvidia.
- kext-dev-mode = 1 to load some drivers correctly.
Check the following points:
- Inject
- Add ClockID
- Fix Ownership
Graphics
You can enable InJect Intel or InJect NVIdia. These two points do not affect anything, but in case of a kernel error, they must be disabled.
Kernel and kext patches
Most likely, you need Kernel CPU, KernelPM and Apple RTC. If you have a Haswell processor, also check KernelHaswellE.
This is one of the hardest parts. Choose the Mac model that best fits your hardware.
System Parameters
Make sure "NVIdia" is not selected and "InJect System ID" is active.
Installing macOS High Sierra
Boot the computer on which you want to install the hackintosh from the newly created USB flash drive. If you did everything correctly, you will be greeted by the macOS High Sierra installer. Keep in mind that the device will reboot several times during the installation process, so keep an eye on what is selected in the Clover bootloader.
On the first boot, select your bootable USB flash drive, on the second, select "Install macOS on Macintosh HD" or something similar. After one or two reboots, a flash drive and three macOS partitions will appear in Clover. These are usually macOS High Sierra Preboot, macOS High Sierra, and macOS High Sierra Recovery. Select macOS High Sierra to boot into the operating system.
Greetings, I would like to consider in more detail the installation and configuration of the Clover bootloader on the HDD hard drive. Every second Mac OS user on a hackintosh has problems setting up Clover on their hard drive. To put it more simply, there are not many settings in Clover itself, but where we will have to dig is config.plist. The slightest mistake or extra entry can prevent the Mac OS X operating system from starting on a PC, passing incorrect values.
It often turns out that the system flies in elementary, even without tambourines - this is possible when an image was selected that was created for a more or less similar PC configuration. But when we install Clover on a hard drive, it does not want to start the system in any one. And you always have to use a flash drive to boot the system. Why go far, I myself used the first months, I didn’t use it until I figured out what and for what.
By the way, it increases security very well, we didn’t think about it. In this case, the flash drive is the key to the system!
Copying the contents of an EFI partition from a flash drive to an EFI hard drive will not help 80% either.
Why is this happening?
The answer is very simple - config.plist is not configured for your hardware. For an installation flash drive, they do not always use a full-fledged configuration file, more often they use a cut-down with a minimum number of patches, blocking the OS X installer from detecting hardware - this is quite enough for the system to be installed.
Even if you are lucky and the transfer of EFI from a flash drive to an HDD will start to start the system, it is not realistic to make predictions about performance and stability indicators. It is not known what values were substituted by Clover automatically.
Once properly configured, ideally EFI and Config.plist should support any version. In my case, I can run and install Mavericks, Yosemite, El Capitan and Sierra with a single bootloader. Therefore, my EFI partition is the same for the installation flash drive and for the HDD.
Installing a Clover bootloader on a hard drive
I recommend everyone to download it, so it will already be modified for newer operating systems OS X. For example, my EFI, which I did 3 years ago, will perfectly launch Mavericks, but does not want to launch El Capitan in any way, but the latest version launches and installs any of them. But it should be noted right away that the latest versions of Clover 2.40 no longer support some older versions of Mac OS X,.
This may be due to the fact that each version of the bootloader has its own shortcomings, which were corrected in the future and this may not be in your version, but in any case it will not get any worse. What errors and shortcomings were corrected, and you can read a hundred supplements. By the way, using the old Clover and SMBIOS IMac, the front USB ports did not work for me, after I installed the latest version of the bootloader - the ports worked, draw your own conclusions.
Today, for the sake of interest, I put several versions and tested it on El Capitan. The boot times and operation of Mac OS X are exactly the same. I wanted to check out the words of a popular hackintosh video blogger who claims that every Clover update takes longer to load, which is complete nonsense. The loading time depends on many factors that I described in the.
1. Download Clover EFI Bootloader.
2. Run the installer.
3. Configuring CLOVER
In my case Clover_v2.4k_r4012, but at the moment it is already available Clover_v2.4k_r4035. Just and I will update))).

We press to continue ...


Changing the installation location on your system drive ...

Click continue and select "Configure"

Now we will consider the settings for UEFI boot, which is supported by almost all BIOS versions on motherboards of the last decade, and it seems to me that the previous one too.
We leave the top two marked points. In this case, there will be some relief for us in choosing additional drivers that are designed for older BIOS versions, additional drivers for NTFS, PS2 Mouse, FAT, and so on.
Some items become inaccessible to us, and for the most part they are not needed. The only thing that can be useful from these items is the selection of the CLOVER menu theme. But when choosing, it should be borne in mind that a beautiful theme takes more time to download and install an additional driver, for normal display on the same HD and FULL HD monitors and on monitors with higher resolutions. There is a desire to turn around.
Go straight to Driver64UEFI

We celebrate EmuVariableUefi-64, OsxAptioFix2Drv-64, OsxAptioFixDrv-64, PartitionDxe-64 Is a must-have set of drivers for running OS X on a PC. In some cases, you may not check PartitionDxe-64 if you have a blank disk formatted during installation, but sometimes the system may not start without it.
CsmVideoDxe-64- this is exactly the driver you need to display on HD, Full HD and high resolution monitors. This driver will stretch the theme according to your screen resolution so that there is no distortion, and will also show a neat little apple, like on real macs. But with this driver, the operating system does not always start and requires a forced restart. Moreover, it can manifest itself whenever you want. You can load for a month without any problems, and then you will see the ban sign. And after several reboots, start the system again. There is a desire to install it, I was still using Mavericks with it, in recent years I have abandoned it on the hard disk, I put it only on bootable flash drives, and that is not always the case.
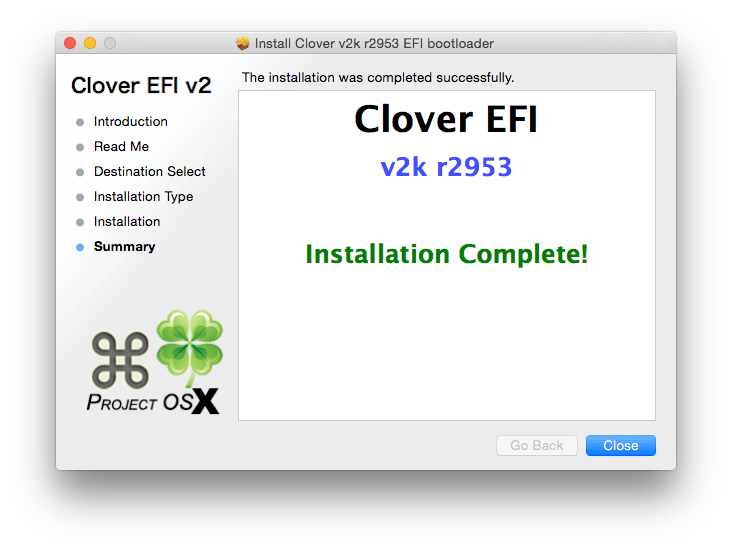
And click install ... Enter the password and close the Clover window after installation.
Setting up an EFI partition
After installation, you will see an icon on your desktop when the EFI partition is mounted, which is automatically created by the bootloader. If you set the settings, as I did, then when you open it you will have the same files on the disk.

Go straight to EFI -> CLOVER -> kexts

We delete folders that we do not need and that we are not going to use. I am removing everything except 10.9, 10.11, 10.12, Other. Other - must remain.
Place in each of the remaining folders FakeSMC.kext- this is a must for everyone or the system will not start.

For Radeon cardholders you will need Verde.kext, when installing and loading Mavericks with an ATI AMD Radeon7xxx video card, Verde is not needed, it works like a native one. In all versions above 10.9, the video card will not start without it, you will see a black screen after the system boots.
Many recommend throwing network caches here, but I don’t do this, so that it would be possible to install and reinstall OS X, if necessary, using an EFI hard disk partition, I no longer need to put CLOVER on a flash drive in this case. I am installing network and audio kext directly on the system.
Did you know that when you format the system partition through the disk utility during installation, the EFI is not formatted, which makes it possible to use it all the time. If you are not sure, put CLOVER on the flash drive, it will not get worse, but it will help to avoid unpleasant situations.
By the way, if you have a lot of EFI partitions, this can be seen from the long list of bootloaders in BIOS, in.
If you have a ready-made DSDT, then put it in EFI -> ACPI -> patched. If you do not have it, skip ...

Pay attention to how it should be displayed. If you just drop an uncompiled file with errors, then it will be displayed as a regular text file. In this case, CLOVER will most likely generate data automatically, regardless of your file.
Configuring config.plist in CLOVER
I am using Clover configurator to set up config.plist. Perhaps in another version it will have a slightly different interface, but after the update it will be like in the screenshots.
Most often, CLOVER automatically generates a pretty good config.plist, but nevertheless it may contain inaccuracies that you will need to fix, and you will definitely need to supplement it.
I am attaching an example:
Generated Clover automatically:

My config.plist:

But still, these settings in most cases are quite capable of starting the system.
If you have a ready-made DSDT, write the name in the DSDT name field. Min and Max multiplier can be specified, but not always. This item can slow down the system, because the BIOS data, DSDT will not match, which will lead to a conflict and a noticeable slowdown in Mac OS.

In point BOOT, you specify the arguments to boot, the timer to automatically start the system CLOVER, the main disk to boot the system.
Arguments:
npci = 0x3000 - used for installation with radion cards, npci = 0x2000 for NVidia. The kext-dev-mode = 1 argument may be required when installing the system. I will not list them all, there are enough articles to describe the arguments. In my case, no argument is needed when downloading and installing any version of the system, yours may need one or more of the above.
CPU is more for cosmetics, what value you set here in the first field:

This value will be displayed in the window about this Mac.
The next important point Graphics
It includes support for Nvidia and ATI cards, but you don't always need to enable these items, they are very different for each series of video cards. If you turn on an unnecessary item, the video card does not start after the system boots, the screen will simply turn off and go into standby mode.
A very important point of SMBIOS, without it the system will not boot.
SMBIOS is the serial and configuration of a real Apple computer. Push the magic wand and select the model that is as similar as possible in configuration. It is important, when choosing a model, to take into account that the version must be supported by your operating system. For example, you should not install IMac 8.1 if you have El Capitan installed - 99% that it will not start. If you make a mistake, boot from the flash drive and change the data to suitable ones. If there is no flash drive, go to the CLOVER -> Options -> SMBIOS menu and insolently change IMac 8.1 to IMac 14.1, for example, in 95% of cases this is enough to install and run OS X.

But there are also small nuances here, since SMBIOS also simulates some of the processes taking place on Apple computers. For example, on my computer, when the IMac is installed, it turns off for a long time - it goes out, but the fans keep spinning for a while, but with the specified Mac PRO everything is fine.
In the last paragraph of System Parameters, it is important to set Inject Kext -> Yes, Inject System ID.

Very often, it is enough to just add SMBIOS to the automatically generated config.plist, but as I already wrote it all depends only on your hardware.
Important! If, when setting up the configuration file, for some reason, not making sure that it works, you turned on fast boot "Fast" or timer "0", and you need to get into the Clover panel, then immediately after loading the BIOS, press the " Space". This will bring up the bootloader configuration and boot selection window.
If you didn't succeed the first time, then you can mount the EFI partition using the EFI Mounter. In Sierra, just using the command in the terminal:
- diskutil list- will show the entire list of disks
- diskutil mount disk0s1- where disk0s1 room EFI section

In order not to be unfounded, I put the configured config when writing config in EFI and rebooted fine. That is, for my hardware, it is quite enough to add SMBIOS to the automatic config.plist created by CLOVER.
Try it, do not be alarmed if the first time you fail, everyone goes through it. Remember that a properly configured config doesn't just work for Mavericks or El Capitan - it works for both Sierra and Yosemite.
For the convenience of working with a large number of files, pages, bookmarks, etc. some programs implement so-called tabs. Tabs are available in all modern browsers and the latest editions of Microsoft Office, but at the same time in the standard "Conductor" they have not been added until now, although they would be appropriate in it.
This problem can be solved by installing special utilities, one of which is Clover.
Clover settings
First, you need to download the program from the official website of Chinese developers. There is nothing difficult in downloading and installing the program, so let's go directly to the settings of the already installed package. It is recommended that you restart your computer after installation. Changes will be applied immediately.
Interface standard "Explorer" will change slightly - only the tabs at the top will appear. There are similar tabs in Google Chrome. The main features that the user needs to know:
- To open a new tab in "Explorer" just press the mouse wheel and move the cursor over some folder;
- When you double-click on an empty space in an open tab, you return to a higher level;
- The tab can be closed by not only clicking on the cross icon, but also by simply double-clicking on it with the right mouse button. You can also close it by simply hovering over the desired tab and clicking on the mouse wheel.
To go to the program settings, click on the wrench icon in the upper left part of the window. Here you can customize the appearance of the tabs by changing the skin. You can also import bookmarks from an HTML file. Additionally, the following parameters are configured by placing checkboxes:

You can perform exactly the same actions with tabs as in a regular browser, that is, move them, close them, switch between them, duplicate, etc.
If you need to pin one or more tabs, then this functionality is also implemented in Clover. Right-click on the tab of interest and select the item "Fix"... After pinning, the tab cannot be closed accidentally, plus, by default, it will be launched together with "Guide".
To unpin a tab, right-click on it and select the option "Unpin"... Now it will be like a regular tab.
There are several useful keyboard shortcuts in Clover:

Working with the bookmarks bar
To transfer any element to "Bookmarks bar" you just need to drag it there with the mouse. You can also select it with a mouse click and press the keyboard shortcut Ctrl + D... To open a pinned bookmark, just left-click on it. It will open in the "Explorer", but if the element being opened is any program, shortcut or file, then the opening will be made in the corresponding interface.
Unwanted bookmarks can be deleted from "Panels"... Right-click on a bookmark and select an option "Delete".

Copying items
Clover has more convenient functionality for dragging and dropping items from one folder to another. To copy a folder, file, shortcut or a group of them, open the tab where you want to move the items. Then select the object to be transferred and drag it with the mouse to the desired tab. The element should have a caption "Copy"... Release the object.

Clover is a great free program that extends the capabilities of your regular "Explorer" Windows. Even an inexperienced PC user can figure it out.
We continue our burning topic of installation Mac OS X onPC... Now we will put Yosemite,using Clover is a brand new open source EFI bootloader that definitely deserves attention. Clover has been created for the last 2 years by a team of developers led by Slice as part of the OS X project. Clover aims to address the inherent problems of existing OS X installation methods and standard boot loaders, namely:
- Problem boot of desktop or laptop in BIOS / UEFI
- Using native OS X installation media
- Possibility to apply patches in DSDT / kernel / kexts at boot
- Creating an OS X recovery partition
- No boot error with 4K Advanced Format disks.
- Troubleshooting Linux and Windows 7/8 Multiboot Systems
- Solving traditional iMessage / FaceTime NVRAM bootloader problems
Clover has a completely different system of settings, which speeds up the receipt of the result many times over. This may surprise those who have only used the traditional Chameleon or Chimera.
Clover is still in testing and there is no guarantee that it will work well on all systems. Its development was fast and aggressive, with significant changes constantly appearing in the code. It might seem like Clover is difficult to learn due to its design. However, recent improvements have fixed a lot, and it has become an attractive alternative for those who are not averse to learning something new.
Warning: The described method requires you to perform a number of steps on a computer with OS X earlier than Yosemite versions installed. It could be a friend's Mac, or your Hackintosh. The simplest option would be to use an OS X virtual machine running in Windows (how to work with the OS X virtual machine, we described in this article).
Installation method using only Windows will be discussed in one of the next articles.
1. Download the OS X Yosemite app from the Mac App Store
2. Preparing a USB flash drive for the installer
3. Installing OS X Yosemite
4. Installing the bootloader and drivers on the system disk
Step 1: Download the OS X Yosemite app from the Mac App Store (or other source)
The operating system is available as a complete free download for anyone who has purchased Mac OS X Snow Leopard, Lion, or Mountain Lion. The app can be downloaded from the App Store using your Apple ID on any Mac or PC computer running Mac OS X version 10.6.8 or later.
1. Open the Mac App Store
2. Sign in with your Apple ID
3. Download OS X Yosemite
4. The OS X Yosemite application appears in the / Applications folder.
Step 2: Prepare a USB flash drive for the installer
This step extracts the contents of the OS X installer, then installs Clover onto the USB stick.
1. Insert USB stick
2. Open / Applications / Utilities / Disk Utility
3. Highlight USB storage in the left column
4. Click on the Partition tab
5. Press Current and select 1 Partitoin.
6. Click Options
7. Select GUID Partition Table
8. In the Name field, enter "USB" (you can rename it later)
9. In the Format field, select Mac OS Extended (Journaled)
10. Click Apply, then Partition
11. Go to / Applications / Utilities / Terminal
12. Enter the following command, enter your password and press enter. This command completely cleans the USB device, then creates OS X installation media from the OS X Yosemite app.
sudo / Applications / Install \ OS \ X \ Yosemite.app/Contents/Resources/createinstallmedia —volume / Volumes / USB —applicationpath / Applications / Install \ OS \ X \ Yosemite.app —no interaction
 Upon completion, the USB will be renamed to Install OS X Yosemite.
13. Download the latest version of Clover from sourceforge (http://sourceforge.net/ projects / cloverefiboot /)
14. Open the Clover installer package
15. Click Continue, Continue, Change Install Location
16. Select USB, now called Install OS X Yosemite
17. Click Customize and install Clover on the same USB with the following custom settings:


 Note: There are several different ways to install Clover onto a USB stick. The easiest way to use Legacy Mode is for Gigabyte 5, 6, 7, 8, and 9 series motherboards with standard BIOS or UEFI settings. For all other UEFI-based systems, for example, based on ASUS 7, 8, and 9 series motherboards, you need to use UEFI Boot Mode to install on an EFI partition on a USB.
A few more tweaks are needed to install Clover:
18. Go to the / EFI / CLOVER / folder and replace config.plist with the attached config.plist *
19. Go to the / EFI / CLOVER / kexts / folder and create a folder named 10.10
20. Go to the /EFI/CLOVER/kexts/10.10/ folder and add 21. In the EFI / CLOVER / kexts / 10.10 / folder add your 22. In the EFI / CLOVER / kexts / 10.10 / folder add 23. Go to the / EFI folder / CLOVER / drivers64UEFI / and remove VBoxHfs-64.efi and add
(Optional) go to / EFI / CLOVER / ACPI / patched / folder and add DSDT.aml and SSDT.aml
See attached config.plist file for minimal configuration.
Step 3: Install OS X Yosemite
Unlike UniBeast, the installation here takes place in 3 stages. The system will reboot twice to complete the installation and create a recovery partition.
1. Turn on your computer
2. Press the hotkey to select the boot device
3. Select USB
If you are using a USB 3.0 port, a boot manager may appear on the screen, in which case follow steps a and b.
1. Select Boot Manager
2. Select EFI USB Device
3. When the Clover boot screen appears on the monitor, select Boot OS X Install from OS X Install OS X Yosemite
4. After that, the system will download the OS X installer
5. For a fresh install of OS X, you must erase and format the desired drive following the instructions below. If you are upgrading Snow Leopard, Lion, or Mountain Lion and you want to keep your files and applications, you do not need to format.
6. Select Disk Utility
Select the drive you want to install Yosemite on in the left column.
1. Click on the Partition tab.
2. Click Current and select 1 Partition
Click Options
1. Select GUID Partition Table
2. In the Name field, enter Yosemite (you can rename it later)
3. In the Format field, select Mac OS Extended (Journaled)
4. Click Apply, then Partition
5. Close Disk Utility
6. When the installer asks for where to install, select Yosemite or your existing installation.
7. When finished, the system will reboot for the first time
8. Press the hotkey to select the boot device
9. Select USB
10. When the Clover boot screen appears, select Boot OS X Install from OS X Install OS X Yosemite
11. The system will boot from the new disk, create a system recovery partition and complete the installation. Once completed, the system will reboot a second time.
12. Press the hotkey to select the boot device
13. When the Clover loading screen appears, select Yosemite
14. The system will start the OS X setup
Step 4: Installing the bootloader and drivers on the system disk
For now, the easiest way to install is to install the bootloader, take the backups from the root of your USB stick, and copy the files directly to the EFI system partition. However, there are a few steps to follow after installing your system. Installing Clover alone will not work for every system.
1. Download the latest version of Clover from 2. Install Clover on Yosemite with the following custom settings:
 (Custom installation: for systems with UEFI)
 (Custom installation: for systems with BIOS only)
These options will install the boot loader on the system drive to the EFI partition automatically as part of the script. Upon completion, the system partition of the EFI drive will automatically mount.
There are a few changes to be made to the default Clover installation options.
3. Go to the / Volumes / EFI / EFI / CLOVER / folder and edit config.plist
4. Go to the / Volumes / EFI / EFI / CLOVER / kexts / folder and create a folder named 10.10
5. Go to the /Volumes/EFI/EFI/CLOVER/kexts/10.10/ folder and add 6. Go to the /Volumes/EFI/EFI/CLOVER/kexts/10.10/ package and add your 7. (Optional) go to the / Volumes / EFI / EFI / CLOVER / ACPI / patched / and add DSDT.aml and SSDT.aml
Note: you can install kexts in / System / Library / Extensions / instead of using a separate folder.
See attached config.plist for minimal configuration, choose the one that suits your system.
config.plist Standard - for desktops with ATI / AMD Radeon HD 5xxx, 6xxx, 7xxx, R9 2xx, 3xx, NVIDIA GeForce 6xx, 7xx, 9xx, TITAN series graphics cards, which corresponds to Chimera / Chameleon GraphicsEnabler = No IGPEnabler = Yes.
config plist - Inject NVIDIA - for desktops with older NVIDIA graphics cards such as GeForce 8xxx, 9xxx, 2xx, 4xx, 610, and 630 series, which matches Chimera / Chameleon with GraphicsEnabler = Yes
Key features
- Boot systems of the Mac OS X 10.4 - 10.8 family.
- Boot Windows EFI and Linux EFI systems (under debugging).
- Boot LegacyOS (Windows XP, Linux, DOS).
- RuntimeServices support, which is not possible with previous generation loaders.
- Automatic detection of the equipment you are using and the assignment of all necessary properties by default. Ability to change them in config.plist.
- Reboot to another system through the "Boot Volume" panel.
- Assigning your own UUID in config.plist. Full compliance with what is written in the system.
- Updated SMBIOS to version 2.6.
- Updated ACPI to version 4.0. Your DSDT can be loaded from the partition from which you will load or from the directories of the bootloader itself.
- Loading the following ACPI tables (SSDT-xx, APIC, BOOT, SLIC, SLIT, SRAT, UEFI ...).
- Assigning the address and value for the reboot register via config.plist.
- Sleep / Wake up the system.
- Forced assignment of PCIRootUID in config.plist.
- Injection of ATI and NVIDIA video cards, as well as the presence of "manual configuration" via config.plist.
- USB patch (LegacyOff, Ownership, Builtin, clock-id) to USB 3.0.
- Injection of HDA properties.
- Injecting the Ethernet builtin property.
- Support for CPU Turbo at the bootloader level.
- Generation of P- and C-states for your processor.
- Loading kext from the bootloader directory.
- Fixing a FireWire error (security mode).
- Manual GUI customization: support for themes, icons, fonts.
- Support for national languages.
- Saving screenshots of the GUI by pressing the F10 key.
- Saving boot.log and preboot.log from GUI by pressing F2 key.
Getting Clover
Getting a binary copy of CloverCloverV2-rev582.zip or manually
Installation
Preparing a USB Flash Drive
Installing Clover by installer
- Reading the introduction
Manual installation
Instructions for advanced users of OS X, * nix and those who want to customize the bootloader as much as possible and know how to use the terminal.
Customization
How to fix DSDT with Clover
Add additional lines to the ACPI section of the /EFI/config.plist file:Remove /EFI/ACPI/patched/DSDT.aml if you get kernel panic.
All mask values are shown below. Some patches require a DTGP patch (0x0001) to work well.
Masks 0x00FF:
0000 0000 0000 0001 = 0x0001 = FIX_DTGP
0000 0000 0000 0010 = 0x0002 = FIX_WARNING
0000 0000 0000 0100 = 0x0004 = FIX_SHUTDOWN
0000 0000 0000 1000 = 0x0008 = FIX_MCHC
0000 0000 0001 0000 = 0x0010 = FIX_HPET
0000 0000 0010 0000 = 0x0020 = FIX_LPC
0000 0000 0100 0000 = 0x0040 = FIX_IPIC
0000 0000 1000 0000 = 0x0080 = FIX_SBUS
Masks 0xFF00:
0000 0001 0000 0000 = 0x0100 = FIX_DISPLAY
0000 0010 0000 0000 = 0x0200 = FIX_IDE
0000 0100 0000 0000 = 0x0400 = FIX_SATA
0000 1000 0000 0000 = 0x0800 = FIX_FIREWIRE
0001 0000 0000 0000 = 0x1000 = FIX_USB
0010 0000 0000 0000 = 0x2000 = FIX_LAN
0100 0000 0000 0000 = 0x4000 = FIX_WIFI
1000 0000 0000 0000 = 0x8000 = FIX_HDA
How to use DSDT fixes:
0000 0000 1111 1111 = 0x00FF = Enable mask correction: bit (0) ~ bit (7).
1111 1111 0000 0000 = 0xFF00 = Enable mask correction: bit (8) ~ bit (15). You need to enable the DTGP (0xFF01) method first.
You can fix DSDT for one function. Need a DTGP patch to work without DSDT.aml.
0000 0000 0000 1001 = 0x0009 = DTGP + MCHC
0000 0000 0010 0001 = 0x0021 = DTGP + LPC
0000 0000 1000 0001 = 0x0081 = DTGP + SBUS
0000 0001 0000 0001 = 0x0101 = DTGP + DISPLAY
0000 0010 0000 0001 = 0x0201 = DTGP + IDE
0000 0100 0000 0001 = 0x0401 = DTGP + SATA
0000 1000 0000 0001 = 0x0801 = DTGP + FIREWIRE
0001 0000 0000 0001 = 0x1001 = DTGP + USB
0010 0000 0000 0001 = 0x2001 = DTGP + LAN
0100 0000 0000 0001 = 0x4001 = DTGP + WIFI
1000 0000 0000 0001 = 0x8001 = DTGP + HDA
Or fix DSDT for multiple functions. Need a DTGP patch to work without DSDT.aml.
0000 0101 0000 0001 = 0x0501 = DTGP + DISPLAY + SATA
0011 0001 0000 0001 = 0x3101 = DTGP + DISPLAY + USB + LAN
1011 0101 0000 0001 = 0xB501 = DTGP + DISPLAY + SATA + USB + LAN + HDA
For the convenience of counting, you can use the standard Calculator application.
Building Clover
Building Clover by hand
To build you need to have Command Line Tools for Xcode - DownloadStart
cd
mkdir src
cd src
curl - -C -L -O ftp://ftp.gnu.org/gnu/gmp/gmp-5.0.4.tar.bz2
curl - -C -L -O ftp://ftp.gnu.org/gnu/mpfr/mpfr-3.1.0.tar.bz2
curl - -C -L -O http://www.multiprecision.org/mpc/download/mpc-0.9.tar.gz
HFSPlus.efi.zip - download manually.
cp ~ / Downloads / HFSPlus.efi.zip ./
svn co https://edk2.svn.sourceforge.net/svnroot/edk2/trunk/edk2 edk2
cd edk2
svn co https://cloverefiboot.svn.sourceforge.net/svnroot/cloverefiboot Clover
make -C BaseTools / Source / C
cd Clover
cp ~ / src / HFSPlus.efi ~ / src / edk2 / Clover / HFSPlus / Ia32 / HFSPlus.efi
cp ~ / src / HFSPlus64.efi ~ / src / edk2 / Clover / HFSPlus / X64 / HFSPlus.efi
./cbuild.sh -xcode -ia32 -release
This script creates Clover32, but it is also needed for EDK2 to be configured. Now we have to correct this configuration.
Libraries
cd ~ / src / gmp-5.0.4
mkdir build
cd build
../configure --prefix = / opt / local
make
sudo make install
cd ~ / src / mpfr-3.1.0
mkdir build
cd build
../configure --prefix = / opt / local --with-gmp = / opt / local
make
sudo make install
cd ~ / src / mpc-0.9
mkdir build
cd build
../configure --prefix = / opt / local --with-gmp = / opt / local --with-mpfr = / opt / local
make
sudo make install
Compiling the gcc-4.6.2 x64-linux-gnu compiler.
cp ~ / src / edk2 / Clover / mingw-gcc-build.py ~ / src / edk2 / BaseTools / gcc /
cd ~ / src / edk2 / BaseTools / gcc /
./mingw-gcc-build.py --arch = x64
Config files
cp ~ / src / edk2 / Clover / build_rule.txt ~ / src / edk2 / Conf /
cp ~ / src / edk2 / Clover / tools_def.txt ~ / src / edk2 / Conf /
cp ~ / src / edk2 / Clover / MdeModulePkg.dec ~ / src / edk2 / MdeModulePkg / MdeModulePkg.dec
Building Clover64 and rEFIt
cd ~ / src / edk2 / Clover /
./cbuild.sh -gcc46 -x64 -release
cd rEFIt_UEFI /
./build64.sh
The ~ / src / edk2 / Build folder contains the build results
Building Clover with CloverGrowerV1.5
For work you need Command Line Tools.Download CloverGrowerV1.5.zip
Unpack it to your home folder
Opening the Terminal
Enter cd CloverGrowerV1.5
I. / CloverGrower.sh
Press Enter (creates a link for the "clover" command)
Press p (it's better this way)
Then we follow the instructions.