How to create an installation image for windows 10. Methods for creating an iso image on windows. We use standard OS functionality
The backup is exactly the same system as yours. It includes exactly the same drivers, settings and all other elements of a functioning system. A backup is different from restore points in that restore points only contain information about changes to the system, while the backup is the entire system.
First of all, the copy will be needed for quick recovery if any problems arise with the system. Recovering a system from a copy is much easier and faster than reinstalling Windows and all the software you need. In addition, after reinstalling the system, absolutely all personalization parameters will be lost. Therefore, it will be very smart and thoughtful to store any means of storing information with an image, in case of any unforeseen problems. This is especially true for those who especially value files and applications on their personal computer.
Consider the best ways to create a copy for two operating systems - Windows 7 and 10
Windows 10 has a handy tool called Backup and Restore. To use this tool you need:

Important! It is not at all necessary to save the system image only to the computer itself, because if it breaks down, then you will not be able to fix anything, therefore, the whole point of backup is lost. Use more reliable storage methods.
Installing from the created disk
There are two main situations when you need the disc we created earlier. In the first case, your working machine will be unstable or incorrectly work, but it will still be in service. Another case - you can't even start the computer in any way. The created disk will definitely help us fix the problem in both situations.
In the first case, adhere to the following algorithm of actions:
- Open the "Start" menu, select the "Options" tab. It looks like a gear.

- We select the section "Update and Security", and in it we click on "Restore".


- We get to the tab "Special boot options" and click on the restart button in this window.

- Next, we get to where we need to install the old system. To begin with, select the item "Troubleshooting".

- Then "Additional parameters", in the window that opens, click on.


- This program will independently search for the image and, if it finds it, will begin to return the system to its state. If this does not happen, then you will have to indicate yourself where the copy of your Windows is located.


- The next step is to confirm the recovery procedure, it will start.

Guide to recovering a system image from a disc

A copy of the "seven"
Owners of a computer with not the latest version of the system also need to take care of their data and save it in some kind of reliable storage.
- The window will display a message stating that data archiving is not configured. We have to set it up. Click "Configure backup", and the computer begins to search for suitable media for recording.

- Select the disk where the backup will be stored.

- Then the system will want to know what to archive. You can trust it to automatically select files, or you can do it manually. Windows itself will back up the entire disk if there is enough space on the media.


Interesting! The most convenient and reliable way to save is to an external hard drive. Not everyone has a flash drive of the required size, and ordinary disks are extremely unstable to scratches and mechanical damage.
Backup using special programs
For backups, you can also use the old and reliable program - Acronis True Image. Its main advantages are simple and intuitive interface and compatibility. The application provides a huge selection of settings for a faster, more convenient and comfortable backup. This is a great alternative to standard tools.
Let's figure out how to use the program.
- Download it. It is free only for the first 30 days of use, so we activate the trial period.

- Now we need what the program will reserve for us. That is, those disks and partitions that are needed for system recovery. By clicking on the computer icon, you can change the copy source that the utility automatically selected "Whole computer". At your discretion, you can add to the backup what you may need.


- Choosing a save location.


- Click on "Create a copy" and wait.


Livecd aomei backupper
For backups, you can also use a reliable program designed for this purpose - AOMEI Backupper. This program is the main competitor of the famous Acronis True Image, it is not inferior in functionality, but at the same time it is free.
Its main advantages are simple and intuitive interface and compatibility with all known operating systems. You can create a bootable disk or USB flash drive with the program if you suddenly need to urgently restore the system without access to a running computer.
Let's figure out how to work with the program.
- Download it. The program is completely free.

- Installation of the program is simple, you just need to click "Next" several times. No unnecessary programs will be installed along with AOMEI Backupper Standard. Initially, it works in English, it is possible to Russify it, but we do not need to do this. You need to download the crack separately.

- Open the program and click "Create a new copy". The only button that you will see in front of you.

- Click on "Back up the system". You can also make copies of files by partitions.

- We select a pre-inserted external hard drive, or a partition on your drive.

- Click "Start". A copy will be created in a few minutes.


Recovery via AOMEI

Backing up with dism
Backup can be done via the command line. For this:

Important! Note that "D:" is the copy storage location. example.wim is its name. The main thing is not to change the extension. "C:" - the place where the files will be copied from.
If you choose one of these methods and create a system backup in the near future, then you and your files will be reliably protected from unplanned problems with the operating system.
Read the simplest and best ways to delete the old folder in the new article -
Video - Windows 10 Backup
Today, many people are interested in how to create an ISO disk image of the Windows 10 operating system. Let us immediately make a reservation that this is quite simple, but to create an image, you will need a special utility that was developed by Microsoft. Moreover, this program allows not only to update the current system, but also to write it to removable media (CD or USB-stick).
You should start with preparing a removable drive - it is important that its volume is at least 8 gigabytes; the creation of such a drive is available for the following versions of the described OS:
- Windows 10 Pro;
- Windows 10 Home.
Now we proceed directly to the process. Below is an algorithm of the required actions.
Step-by-step guide to creating an ISO disc in Windows 10 using the installer
First, connect a disk (it is quite obvious that it should be a DVD-R) or a removable drive to the computer, and then check if the storage medium has the required amount of memory. Then follow the instructions.
Step one... Click on the Windows 10 Setup icon. Then a window will appear in which you need to select the second item ("Create installation media ..."), as shown in the image below. After that press the "Next" button.
Step two... In the next window, this utility will prompt you to set the required parameters, including architecture, language, etc. After selecting everything you need, click the "Next" button again.
Note! It is imperative that the chosen ISO image architecture matches the parameters of the computer itself where you plan to install it. Tellingly, the program allows you to choose not only a 32/64-core system, but also both options at once.
If you chose the first option, then you will have two paths:
- burn to DVD;
- first create a disc.
In the second version, respectively, recording is possible only immediately to a removable drive.
Step four... When you select the appropriate item, click "Next". If the recording will take place directly to the USB flash drive, the operating system will show the available media.
Note! Who does not know, during the recording, all information on the flash drive will be deleted.
Step five... When you click the Next button again, the installation or recording will continue.
Step six... In the first option, that is, when it comes to choosing the "ISO file" item, several folders will be attached at once, where the image will be saved, or the drive. It is quite obvious that there should already be a DVD-R disc that has the required amount of memory. Having saved it, you can later burn it to any convenient medium.
Note! Such operations are possible only on those computers on which the operating system is Windows 7 or higher.
Features of installing Windows 10 from an image
Installing an operating system is straightforward; no special skills or skills are required. To start the installation, insert a USB flash drive or disk, and then, when the computer restarts, press any button after the corresponding message appears ("Press any button to boot ..." or something similar, it all depends on the specific type of system). Before that, you need to click in the BIOS settings to boot from a disk or flash drive.
The next step is that the system will ask you to enter a product key. You will find this key on the package, or if you are just updating the OS, select "I do not have a key".
Accept the user agreement and decide on the type of installation. If you do not belong to "advanced" users, then it is better not to use the custom installation.
Then you will find yourself in the window for selecting the partition where the operating system will be installed.
When all the required actions are completed, the system will be installed, after which it will ask you to customize it "for yourself". More specifically, these settings include:
- installation / configuration of standard programs;
- creating your account.
Here you can decide on your own whether to keep the basic settings or adjust the parameters again. That's all, now you know how to create an ISO image of Windows 10. For more detailed information, we recommend watching the thematic video below. Good luck!
The overwhelming majority of users (perhaps you are one of them too) disdain the function that allows you to back up Windows 10. By the way, it’s in vain.
It also provides a system backup function. Moreover, by default, the image is created for all media files, documents and SMS, calls and bookmarks in the system browser or application.
To do this, you need to go to the "Settings" application in the "Update and Security" section.
There you need to find the archiving service. You need to put the toggle switch to the "on" position under the line where it is proposed to create a backup copy of the content.
Interestingly, the user can independently choose which parameters will be backed up and which will not. This can be done using the "Other parameters" section.
True, if on a PC it was possible to independently determine where the system image would be written, on mobile devices everything is automatically saved to the OneDrive account.

Regular system recovery
If the backup was performed in the first way, then in case of a critical error and incorrect system operation, go to the "Shutdown" section in the "Start" menu, select the restart item and click on it while holding the Shift button.
When you reboot, the additional options screen will open, where you must click on "System Image Restore". After selecting this item, the system will look for a backup copy and try to install it, so you need to take into account that the media must be inserted into the PC (if we are talking about a flash drive, CD or external hard drive).

via DISM
In the event that the Windows image was recorded using DISM, you need to open the administrator command prompt (as was done above), where you will need to enter:
- diskpart.
- list volume.
- We remember on which disk the backup is stored (according to the "Name" column) + the disk that will contain the system.
- select volume 5.
- select volume 6.
- format fs-FS quick.
- assign latter = V.
- exit.
- dism / apply-mage / imagefile: * drive where the backup is stored *: \ * backup name * .wim / index: 1 / ApplyDir: 6: \.
- bcdboot: 6: \ Windows / s V :.
- diskpart.
- select volume 5.
- remove letter = V.
5 - number of the disk with the system.
6 - number of the disk where the system will be installed.
V is a latin letter that will be assigned to the system partition.
Then you will need to restart your PC and the system will be restored.
System recovery via LiveCD Aomei Backupper Standard
To restore the operating system using this utility, you need to open this program and go to the Restore section, which is located in the side menu. The program itself will find where the system image is stored and will offer to install it. This is possible only if the media with the image is connected to the PC or some disk inside the system is such.
In any case, you can specify the path to the backup yourself.
After all the settings (if they were made), click on Start Restore, which will be highlighted in orange.
As it turns out, creating a Windows system image is a snap. The main thing to learn is that you should not neglect the backup function and, if necessary, it is better to use it.
Who knows what data you will need in the future. It is better to make their image so as not to lose completely in the future.
All these actions are applicable to the mobile version of the operating system from Microsoft, because now users store a huge amount of important information on smartphones and tablets - mobile devices that are always at hand. Yes, cloud services in Russia and the CIS are not so popular yet.
Creating and recording an image of Windows 10 to a disk or flash drive is a guarantee of a quick recovery of the system's performance in the event of a crash or incorrect settings that could not be canceled using standard Windows tools.
Why do you need a Windows 10 system image
The Windows 10 image is needed to burn the installation flash drive. With its help, it is possible to reinstall the system "from scratch" when the user is not satisfied with the update by standard means. The Windows image may also be required to fix problems with starting the OS, to reset it to its original settings, leading to the removal of all programs and unnecessary devices installed after the system recovery image was created.
The system image is created using the following applications:
To write an installation flash drive, you need a ready-made image. That is, you first need to prepare the ISO file itself with a copy of Windows 10.
Windows 10 imaging work
All methods are fairly easy and reliable. Performing any of them is unlikely to take you more than half an hour, especially if the PC or tablet on which you are creating the OS image is powerful enough.
It doesn't matter which of the latest versions of Windows you burn - 7, 8, 8.1 or 10. They are all easily created in ISO format.
Create a Windows Image Using the Backup Wizard
If you create not just a system image, but an image of the C drive (Windows system with installed PC hardware drivers), the following preparatory work is required:
You should not install any extra applications. Otherwise, you will get an OS image that freezes due to dozens or even hundreds of installed applications, as a result of which the meaning of creating an image is lost. Such assemblies (for example, ZverDVD for the XP version) do exist, but they are rare.
Modern versions of Windows, in particular 8.1 and 10, already contain most of the drivers. So, network adapters and sound are integrated into the top ten, and you don't need to install outdated drivers. Thus, you will only disrupt the operation of modules and devices that Microsoft has already taken care of.
The backup wizard is not much different in Windows 7/8 / 8.1 / 10.
 Backup and Restore Wizard lets you create a Windows disk image
 System Image Creator helps you copy system and program files to an ISO image
 Drive C may not be suitable for saving Windows archive
 For archiving, drive C is set by default
Saving the contents of the system and program folders on the C drive will take 20 to 40 minutes. After that, you will have a ready-made ISO image that can be written to an external drive or flash drive using applications such as Media Creation Tool, Rufus, WinSetupFromUSB, Universal USB Installer, etc.
Video: How to Create a Windows 10 Image Using the Backup Wizard
Capturing Windows 10 Image Using Third-Party Utilities
Third-party utilities, such as Nero, Daemon Tools and Alcohol, were actively used to create a Windows 10 image from a licensed DVD. However, you can write a Windows 10 image to a USB flash drive or to an external HDD / SSD drive. For this, both a ready-made assembly of Windows 10 in ISO format downloaded from a torrent tracker and your personal ISO archive created using the archive wizard (see the instructions above) are suitable. The latter method eliminates the need to reinstall hardware drivers and applications that you need to work with the system.
Burning an image to DVD is morally obsolete: modern ultrabooks, netbooks and tablets are shipped without a CD-ROM drive. All actions - recovering data after a Windows crash and reinstalling the system, fixing startup problems - are performed from a flash drive, memory card or SSD drive. Therefore, do not focus on burning a Windows image to DVD.
DAEMON Tools
To burn an image using DAEMON Tools do the following:
 Pay due attention to the settings before capturing the image
That's it, the DAEMON Tools application will start burning the installation disc or flash drive. Creating a boot record takes up to several seconds, its volume does not exceed several megabytes, but it will take at least 20 minutes to wait for the image to be recorded.
 Copying a Windows image can take 20 minutes or more
 Once the copy of Windows has finished burning, DAEMON Tools will report the success of the process.
 All steps for copying a Windows image are described in detail by the program
 The recording speed through the USB 2.0 interface, which has been used in all PCs and gadgets for 15 years, reaches 21 MB / s. Most modern PCs and laptops are equipped with USB 3.0, and using more modern media almost doubles the speed of USB 2.0. If a flash drive or external drive has been actively used for several years in a row and is worn out, the final write speed may drop several times. The newer the media, the faster all files will be written and there will be less problems when updating / reinstalling Windows from it - take this seriously. Another reason why you should not use CDs is that the read / write speed here is several times lower (in units of megabytes per second) than the speed of flash memory used on modern media.
Video: how to burn a system image to disk using DAEMON Tools
Alcohol 120% (57%)
Everything that has been said about the expediency of writing Windows 10 to a USB flash drive does not work with Alcohol brand software, which were created and updated mainly for working with "blanks" - CD / DVD / BD, and not with flash drives and memory cards. Therefore, alas, it is better to forget about flash drives here. For this reason, the Alcohol utility is being actively replaced by competitors - WinSetupFromUSB, Rufus and other applications that work with electronic rather than optical media.
To create a system image using Alcohol 120%, follow these steps:
 The Alcohol 120% application is paid, but you can also use the lite version
 Select the functionality of recording an image in Alcohol 120%
 Windows 10 image must be downloaded in advance to burn to disk
 Recording at 1x speed is ideal - this will reduce write errors to zero
Write speed affects Windows disk write errors. Do not forget that it is not a selection of music or photos that is recorded, but an image of the operating system. The requirements for the quality and error-free installation discs are very high: if a system error occurs during Windows installation and the OS hangs in the same place, restart the recording. The best solution would be to use a 1x-12x disc from a multi-year firm like Verbatim, Sony, TDK or SKC.
Video: how to burn a system image to disk using Alcohol 120%
Alcohol 52%
The capabilities of the "younger" program Alcohol 52% are even more curtailed: it does not write images to DVD, although it is free compared to Alcohol 120%.
Mounting images on a virtual DVD will do nothing. The image is written to a separate object, information about which is stored on the built-in PC (local) disk, and not on external media. And flash drives and memory cards are identified by Windows as external, and not as local drives.
It is unlikely that you will be able to burn a Windows image to an external medium, be it a DVD or a USB flash drive, since Alcohol 52% simply does not know how to write images to external drives, as described in the application description. Launching Windows 10 from virtual media - except perhaps a LiveDVD / USB version taken from any disk - doesn't make sense. It's easier to set the BIOS / EFI to boot from this disk and start from it. It is better to use more modern analogs, in which there is recording of images to disk and a USB flash drive, for example, UltraISO.
Nero
As with Alcohol, Nero's ability to burn to media other than all sorts of CD formats has been curtailed.
 Click the button to continue using the trial version
 Select the type of data disc for recording the Windows image
 You must have a Windows 10 ISO image stored in advance
 After pressing the start burning button, Nero will start copying the Windows image
Burning a disc can take up to an hour (depending on speed), after which the disc is ready to install Windows 10.
Video: How to Burn a System Image to Disc Using Nero
Other applications for capturing Windows images
You can write Windows to a USB flash drive using:
Some of them are suitable not only for recording Windows images, but also for other operating systems, as well as multiboot disks.
For burning to DVD, in addition to some of the above applications, the Windows USB / DVD Download Tool created by Microsoft is suitable.
Problems when capturing a Windows image
The following problems may occur when capturing Windows images:
The choice of media for creating and recording a Windows image - disk or flash drive - is yours. Both are good, but they depend directly on what kind of PC you have, and whether it has a floppy drive or USB ports.
Good afternoon friends. In one of the previous articles, we examined how to roll back the system using the program. Now we will figure out how to create a Windows 10 system recovery image on a USB flash drive and an external hard drive using the utilities of this operating system. The advantage of this method is that there is no need to spend money on the purchase of new software, since the system method is free.
This program is configured so that only folders and files of the system drive C will be copied. But, you can configure the program so that other PC disks that you want to save will be added to the copy area. When you roll back, programs and files will be restored in the form in which they were at the time of copying. Also, you can copy only the entire disk, and not its individual files.
Create a Windows 10 system image
Let's enter the phrase "Control Panel" in the search bar. Click on the found file.

File History command.

In the window that opens, select "System image backup".

Then we select "Create a system image".


Windows starts looking for space on GR for our backup. I advise you to choose a storage location on a flash card with a size of 32 GB or more. Also, you can choose an external hard drive for recording the system, or another physical hard drive.


Why exactly on a USB flash drive or other disk? Because if all the data from your drive, on which Windows 10 is installed, disappears, or the drive fails, the system can be restored from another drive.
If you install data on the same disk where your system is located, but in a different partition, you will receive a warning about this next to a yellow triangle. If you do not have a flash drive with a volume of 32 GB or more, the system can be installed on the system hard disk (but not on the system partition of this hard drive).
In this case, you can roll back the entire system if everything is in order with the hard drive and the computer can be started. Also, you can roll back the system if Windows is heavily cluttered with all sorts of system junk.
Let's say you have selected a USB flash drive, then the system will issue a warning.

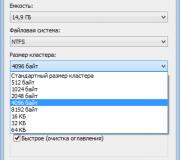
In this case, we need to format the flash card in NTFS format. To do this, select your USB flash drive in the "Explorer", then, in the context menu "Format".

In the "File System" menu, select NTFS and click "Start". Our flash drive will be formatted in the format you need to create a Windows image.

Let's go back to archiving. We see that the system has identified the disk from which the information will be copied, and the approximate amount of data. In my case, this is 11 GB. Click "Archive".

We start archiving. On my computer it lasted 30 minutes. You may have more. It depends on how much information you have.
Now on the disk that you assigned to store the system image, a folder will appear WindowsImageBackup. Do not rename it under any circumstances.
If you copied not to a USB flash drive, but to the system disk, the program will prompt you to create.


How to start a system rollback
When the system is running
If your system is working, go to the settings via Start, then click on the "Update and Security" shortcut,


In addition, to enter the "Advanced options" you can just press Shift and "Restart computer".
After rebooting, click on the item "Troubleshooting",


After recovery, the program will ask you to restart your computer.
When the system is not working
We start the computer by connecting a USB flash drive (do not forget to check the "Start from a USB flash drive" item in the BIOS). Then we go through the path as if the system is running.
As you can see, creating an OS image is pretty simple. Let me remind you that you need to carry it out after reinstalling Windows and preferably once every two / three months (more often). Good luck!