How to set wallpaper on Windows 7. Video and live wallpapers for Windows from the developer Push Entertainment. Installing "live" wallpaper on the desktop
Detailed description ways to set animated video wallpaper in Windows 7/10 using third-party programs.
Animated wallpaper in Windows 7
- Download the DreamScene Activator program.
- Run as administrator and click on the button " Enable DreamScene«.
If necessary, restart the computer, go to the folder with the saved dream scenes (animated wallpapers), click right click mouse on the video, in the appeared context menu select the option “ Set as Desktop Background". Everyone, enjoy the result.

Note 1. After installing the video wallpaper, there may be defects with the shortcuts on the desktop and the fonts of the signatures.
All this is corrected in this way:
- In the folder settings, turn on the display hidden folders and files.
- Go to \ AppData \ Roaming \ Microsoft \ Windows DreamScene.
- You will find 2 files of the current video-saver (one of them is hidden).
- In the properties of both files, set “read-only” and uncheck “hidden”.
- Right click on desktop> personalization> desktop background.
- Below the dream scene selection menu, you will see both image files.
- Make sure both files are ticked!
- Set the position of the image to the "Fill" mode.
- Save your changes.
Note 2. In order for the video wallpaper to work in the Visual Windows effects 7 you need to set the parameter " Provide best view «.
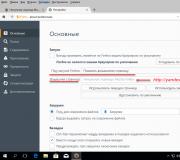
To do this, go to Control Panel => System and Security => System => Advanced System Settings => In the System Properties window, the Advanced tab => System performance (Settings) => In the Performance Settings window, the Visual Effects tab "=> Select the" Provide the best view "option (see screenshot).

Animated wallpaper in Windows 10
The question about how to make live animated wallpapers in Windows 10, put video as a desktop background is one of the most frequently asked questions from users. In the most operating system there are no built-in functions for this purpose, and the only solution is to use third-party software.
From what can be recommended and what exactly works - the program DeskScapes, which, however, is paid. Moreover, the functionality is not limited only to animated wallpapers, but also to additional buns.
Download DeskScapes can be from the official site
Hello to all viewers and subscribers of the site, and the channel What's with the computer?) Today we will install live wallpapers on our desktop. Let's first go to the site from which you need to download the wallpaper to your taste.
Here's to this site. We go to the section of live wallpapers for Windows, and we see there a large number of categories, from nature to fantasy. We select the category of interest to us. In my video, I chose nature - Tropical Island.
- Downloading the DreamScene archive
- Copy DreamScene.dll to the \ Windows \ system32
- Copy DreamScene.dll.mui to the \ Windows \ system32 \ en-US
- Run the file "DreamScene-x64.reg
- Restarting your computer
After restarting your computer, right-click on the desktop and select Personalization... We need to choose any of our standard Aero themes - this is necessary for our wallpapers to work correctly.
We return to the site we need with live wallpapers and download them by clicking on the corresponding button Download.

We extract the downloaded archive to the desktop. Right-click on the video inside and select Set as Desktop Background... Our live wallpaper has been installed.
How do I fix the problem with displaying FONTS?
After installing the animated wallpaper, there may be problems with the fonts of the signatures of the shortcuts on the desktop.
You can fix them like this:
- In the folder settings of the explorer, enable the display of hidden files and folders.
- Go to directory C: \ Users \ user_name \ AppData \ Roaming \ Microsoft \ Windows DreamScene.
- Find 2 files installed in this moment video wallpaper (one of these files will be hidden).
- In the properties of these two files, uncheck the "hidden" checkbox and set "read only".
- Right click on Desktop \ Personalization \ Desktop Background.
- Under the dream scene selection menu, you should see both splash files.
- Make sure both files are checked!
- Switch the wallpaper display mode to "Tile" or "Fill".
- Then save the changes you made.
Here is my detailed video on this topic from YouTube, thanks for your attention.
There is no fundamental difference in terms of effect between video and so-called live wallpapers for the desktop. Both options look equally impressive. The difference between them is purely technical. Video wallpapers exist in the format of video files and are played in a loop, while Live Wallpapers are looping scenarios like screen savers. Live wallpapers are more often represented by computer graphics. And among the video wallpaper, there are both graphics and shots from real life. Both those and others are a luxury that takes away the system resources of the computer and does not carry practical use... Therefore, a prerequisite for their installation is at least the average characteristics of the hardware of a PC or laptop. The second condition for installing video and live wallpapers on the Windows desktop is the use of special software, since the system does not provide for this feature. Such special software is available from the developer Push Entertainment, and we will talk about this software in detail below.
1. Software products by Push Entertainment
On the official website of the developer Push Entertainment, push-entertainment.com, we will find two types of software for installing, respectively, video and live wallpapers. Video wallpaper work in Windows environment provides a small program Push Video Wallpaper, inside of which you can select individual video files for playback on the desktop and create playlists. And live wallpapers provide for the installation of utilities in the system separately for each theme. Push Entertainment software is compatible with Windows 7, 8.1 and 10.
Push Entertainment products are paid (you can check the prices), but you won't have to pay for a pig in a poke. Both the video wallpaper installer and the live wallpaper themes are initially installed in fully functional trial versions, which can be registered for a fee only after thorough testing of the content. We will return to the question of the specifics of trial versions when we consider the installation and configuration of separate video wallpaper and separate live wallpaper.
2. Installing and configuring video wallpaper
To install video wallpaper on your desktop in the download section of the Push Entertainment website, download the Push Video Wallpaper program.
Before completing the installation of the program, if you wish, you can check the "Set as Screensaver" option, and then the assigned video wallpaper will also play the role of a screen saver. However, this moment can be configured at any time later in the Windows screen saver settings.

After the program starts, first of all, open the “Setting” tab to display the program icon in the system tray. It's better to set up right away fast access to the program options. The commands to pause and start video wallpaper playback in the context menu on the program icon in the system tray will come in handy if you need to use the full power of your computer to perform some resource-intensive tasks. Set the active option "System tray icon". Also, the program can be assigned to launch along with the system, this is the option above "Launch at Windows Startup". Without working in background Push Video Wallpaper, of course, will not play video wallpaper.

The main tab of the program "Main" is an interface for managing video wallpaper. The software comes with only one Sample Video. More choice video wallpaper can be obtained on the Internet at a dedicated web resource. Click the download button at the bottom.


Push Video Wallpaper works with WMV video format. So the choice of video wallpapers on the website offered by the program can be expanded - download videos of this format anywhere else or convert another source video format into it.
Add a selection of videos to the playlist of the Push Video Wallpaper program. We press the plus button, select the prepared videos and press "Ad to playlist".

Start and pause video wallpaper, rewind video clips using the buttons at the bottom of the program window. For video with sound, a volume control button is provided. Among other options at the bottom of the window are options for adjusting the image and choosing the speed of video playback. The buttons in the upper right corner of the window are responsible for the periodicity of changing videos, random and cyclic playback of the playlist.
Videos will be added to the default playlist by default, but you can create as many playlists as you want with different selections or single videos. To do this, press the playlist management button, select "New" and set the name of the new playlist.

The choice of a playlist for playback is carried out in the drop-down list of the "Playlist" column.

The creators of Push Video Wallpaper have chosen the tactic of not limiting the user in functionality trial version, but wear it out by periodically pausing video wallpaper playback and throwing a proposal to register a paid version on the screen. And before buying the latter, you will have to constantly press the "Continue Trial" button to continue the trial version.

On the desktop itself, the inscription "Trial Version" will be applied.

3. Installing and configuring live wallpaper
In addition to the Push Video Wallpaper program, all other content in the downloads section of the Push Entertainment website is utilities for setting various themes of live wallpapers in 3D.

During the installation of live wallpapers into the system, the option to install them as a screen saver - "Set as Screensaver" - is pre-installed. It can be removed if desired.

Theme utilities are minimized to the Windows system tray, from where they can be called at any time to customize the playback of live wallpapers.

The utility of each individual live wallpaper theme provides its own individual settings... These can be settings for the speed and direction of movement of objects, color schemes, lighting parameters, etc. The universal options that are present in the utilities of all Push Entertainment live wallpaper themes are only organizational ones - assigning a launch together with Windows, disabling wallpaper playback, registering and paying for a license.

As in the case of video wallpaper, until the moment you pay for each live wallpaper theme, the trial version of its utility will periodically turn off spontaneously. Screen savers with unregistered live wallpaper themes will be accompanied by an inscription stating that the trial version is being used.
Have a great day!
As many probably remember in some Windows versions Vista had such a spectacular feature called Dreamscene. It allows you to set videos in .wmv or .mpeg format as the desktop wallpaper.
In Windows 7, a wallpaper slideshow appeared instead. However, Dreamscene did not disappear anywhere, but was simply deactivated and hidden in the bowels of the system. In order to make it possible to use, you can use a tiny utility Windows 7 DreamScene Activator .
After downloading and unpacking the archive, you must run the file with administrator rights (right click - Run as administrator). Then you need to press the button Enable DreamScene.
Now a new item will appear in the context menu of video files Set as Desktop Background with which it can be set as the desktop wallpaper.

Now all that remains is to visit the site http://www.dreamscene.org and choose a suitable video for your desktop, and there is definitely something to choose from - several hundred selected scenes are sorted into categories. However, there are enough other places on the net for downloading suitable videos - google it.
All this splendor has only a small drawback - the labels of icons and folders on the Desktop become translucent and therefore difficult to read. But this is easy to fix. We go into the properties of the desktop ( Personalization - Desktop Background - Solid Colors) and choose white. That's it - the inscriptions became visible again.

Anticipating the groaning of some ascetics, I would like to note in conclusion that, of course, Dreamscene does not bring any benefit, but only consumes system resources. But on the other hand, if the performance of the processor is constantly growing every year, then why not keep it busy? :) Moreover, when a full-screen window is open, the video is paused and system resources are not consumed.
Hello dear readers of my! In this article, I will tell you how to set video wallpaper on your desktop windows table 7 .
Install video wallpaper on your windows 7 desktop
First we need DreamScenes program. It weighs only 18MB. Also there we can read a short manual for setting wallpaper, you can also use it. After you have downloaded DreamScenes, extract the program from the archive and go to it. Next, a window will appear where we confirm that we are the administrator of this computer. Then the program itself will open, there we click Enable, and then Finish. This is, in principle, the whole installation. We close the window with the program, restart the computer.
After rebooting, go to the C: \ Windows \ Web \ Windows DreamScene folder, there will already be one dream, to start it, right-click, select Set as Desktop Bacrground. New dreams for installation, just throw in the same Windows folder DreamScene. You can also install the wallpaper by right-clicking on the video file and selecting “ Set as Desktop Bacrground» .
So, all we have left is download video wallpaper and set it as background... To do this, go to any site on which video wallpapers are provided, there we download any you like video wallpaper... Then extract the downloaded wallpaper from the archive. After extracting, we need to install it, for this, just click on its shortcut with the right mouse button and select "Set as Desktop Background".
That's all, video wallpaper is now set on our desktop. If, after installing the video wallpaper, you have problems with the test on the desktop, then do not be alarmed, it is very easy to fix it. To solve this problem, right-click on the desktop and go to the "personalization" tab. Then select the item "Desktop background" and select "solid colors" from the drop-down list. There we select white and click save. All the problem with the text is gone!